Tuesday, October 31, 2017

SOS 327: Halloween!!!

Happy Halloween, ghouls...

This week at Shopping Our Stash, we are celebrating Halloween!

Halloween is my favorite... absolute favorite.  We decorate our home October 1st, but in reality, a lot of our Halloween decorations stay up year-round.


For these SOS challenges, I really make an attempt to use items that haven't been used ever, recently, or often enough.  This tag has a lot of elements on it that I might not usually grab, but I reminded myself to look through my supplies and ended up finding those cool grey-pearl brads and other things, listed below, that haven't seen the light of day for a long time.

Supplies and notes:
  • The base tag was made last year and was in my Halloween box
  • I mixed Liquitex gesso with Chocolate Truffle Magicals... it oddly turned grey... and I added it to the tag
  • Painted the edges with Finetec watercolor in Sterling Silver.  This is what I'd consider another stash item-- completely hoarded.  I waited a long time to order these awesome watercolors because they are expen$ive, but now I, like, covet them... 
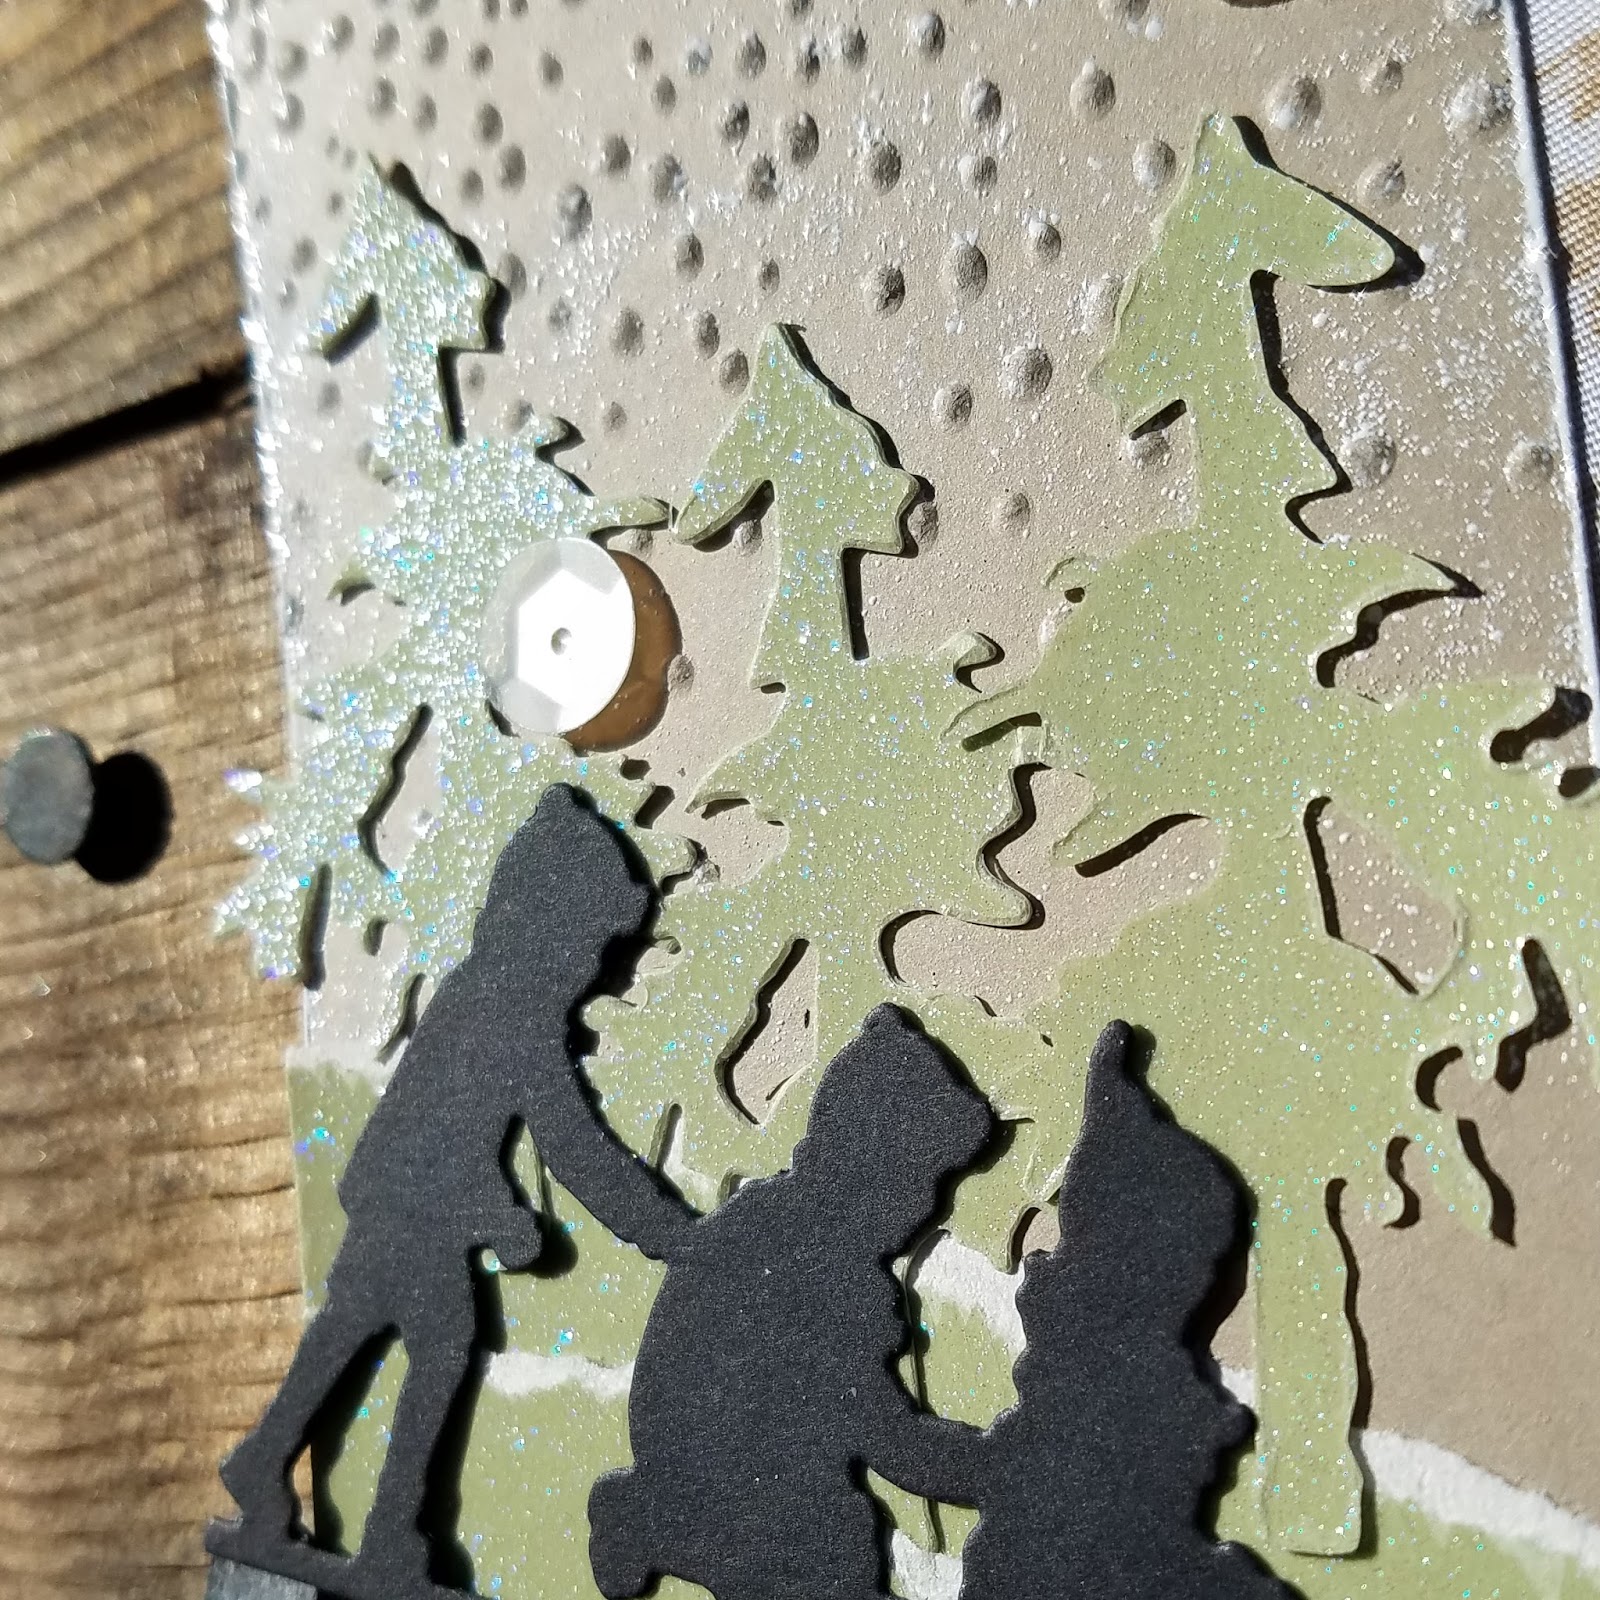
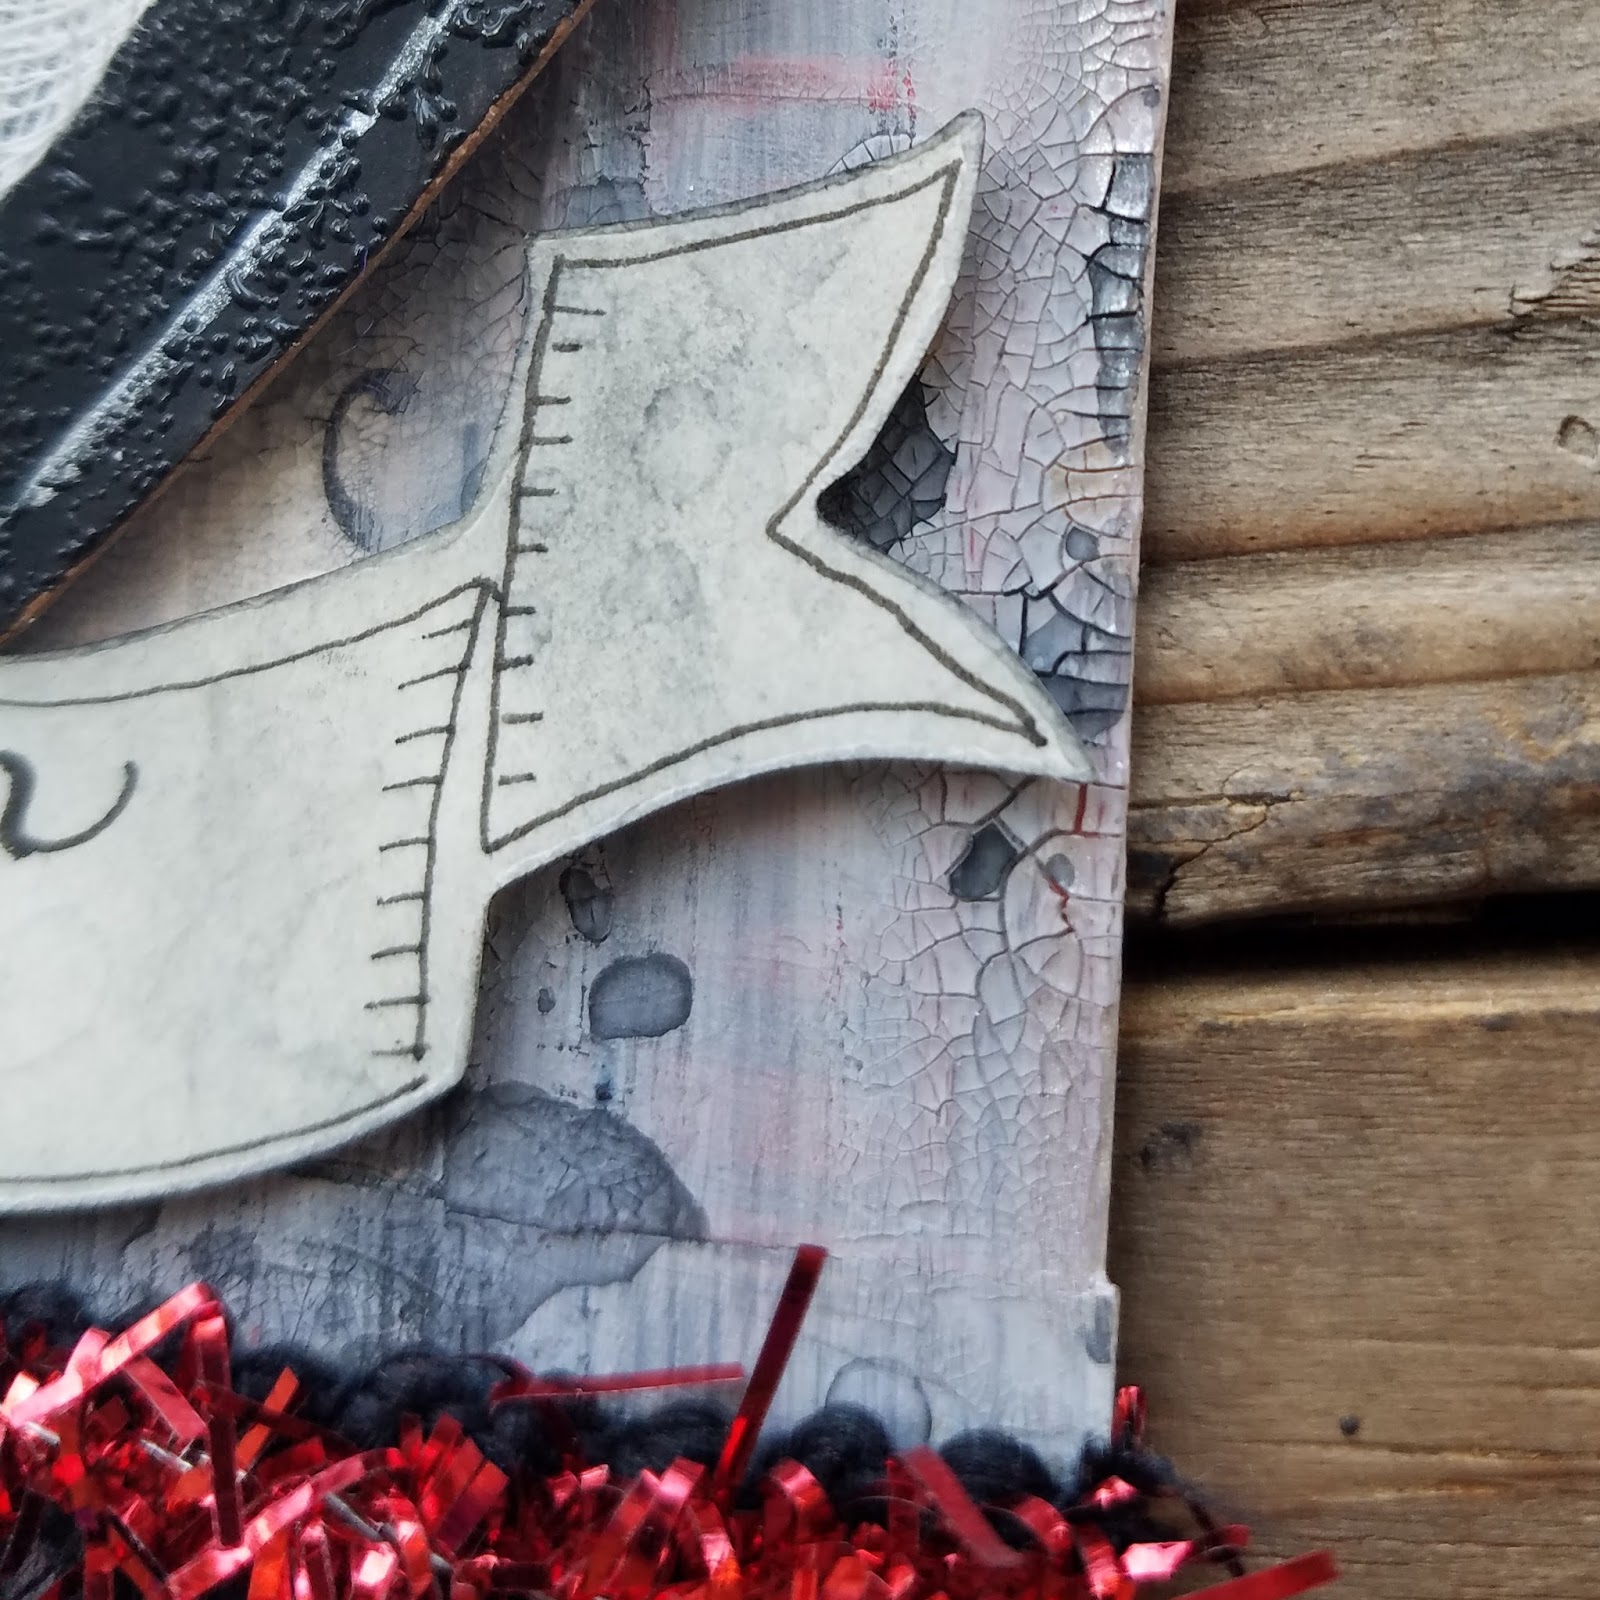
  • The arch panel is a Tim Holtz die, painted with Liquitex gesso in black then stamped with Tim Holtz's doily stamp (which I do not use often enough) in the Distress embossing ink then embossed with old Custers Last Stamp clear embossing powder
  • The panel was affixed to the tag base with brads that have been in my stash for years-- I can't even picture the set they came from.
  • A bit of cheesecloth was then glued to the arch and the wooden skull piece wasset on top.  The skull came from Michael's (I think) last fall.
  • The eyelash trim at the bottom was purchased on clearance a month ago at Michael's and the red tinsel trim was from a gift-wrapping display at a local market last holiday season.
  • The red flowers at the top started out with the flowers from THIS project.  I sprayed them heavily with Dylusions spray in Pomegranate Seed (after I sprayed it all over my face and ran to the bathroom, all the while scrubbing with a baby wipe and screaming, LOL... not really funny...) then I added some Glossy Accents to the centers and sprinkled with some Stampendous glass glitter (something I hoard...)
  • The dark flowers were originally white, bought in bulk.  I sprayed them about 18 months ago with Rustoleum hammered spray so they look all rusty and crusty and dark.  
  • The banner at the bottom is from a Tim Holtz die bought in August but not used yet.  I cut it from a library catalog card then inked it with Black Soot DI, then did a little spritz'n'flick for the droplets. I added the words and accent lines with Micron pens.  I popped it up with 3M dimensional adhesive.
Thanks for dropping by... happy haunting!


Friday, October 27, 2017

Really (girly) wonderful!

My teen asked for a birthday card to give to a friend of hers.  I really went with a girly card-- they are teens and acting so mature-- I just love when my daughter still acts like a little girl with her friends.


Supplies and notes:

  • 6" Square base inked in Picked Raspberry DOx then stamped with Seth Apter's circles in Versamark Dazzle Watermark pad in Champagne then embossed with Ranger EP in Princess Gold
  • The colorful panels were leftovers from inking a page of Cosmo Cricket watercolor resist paper colored with Color Bursts.  I added these with the sewing machine.
  • Gold thread laid on the card and Tim Holtz paper dolls set on top using 3M dimensional adhesive.  The paper dolls were edged with Stickles in Mercury Glass.
  • Gemstones from my stash
  • Sentiment stickers from the dollar store-- what a find!
I'd like to share this at the following two challenges:

Tuesday, October 24, 2017

12 Tags of Xmas: Tag #4

Here's my fourth tag for The Funkie Junkie's (a.k.a. Linda's) 12 Tags of Xmas:


Here's Linda's inspirational tag:
I pulled a few things from Linda's tag, including the snow gradient, the silhouettes, shabby ribbon, bells.  In hindsight, I wish I would have made the sentiment black as well-- that may change...

Supplies and notes:
  • Tag base is an embossed piece of beige cardstock from my friend Pia
  • Raised parts of tag inked with Versamark the embossed with Recollections in Snow; edges embossed in this way as well.
  • Trees (by Tim Holtz) diecut from some glittery scraps from DCWV
  • The hillside was ripped from the same DCWV scraps
  • The kids on the sled are also from Pia... I came across them as I was looking for that fab embossed background.  Thank you, Pia!
  • The thick seam binding is from my stash; I incorporated text to my project by stamping Tim's Ledger Script with Tim's MM Palette in Vintage Photo to the ribbon.  It bled a little, but I am totally okay with it.
  • The bells are from some holiday trim I bought recently.  I pinned them on with a Paper Studio safety pin and added a typed sentiment which I typed with my old typewriter on old typewriter paper
  • Sequins added
I'd also like to add this to the HLS Xmas challenge:

SOS 326: That's sketchy...

Welcome to my blog!  They're paying me for another week at Shopping Our Stash, and this week I'm workin' hard: our hostess Donna wants us to make a card or project using a sketch, any sketch.  Holy smokes... soooo many sketch archives out there...

I went straight to Mojo Monday's archives.  Back when I was a young blogger, Mojo Monday was hugely inspiring and Julee and her crew were very supportive.  Although the challenge blog ended after sketch 500, you can still access the old sketches and posts.  I chose sketch 176 from 2011.

I made a tin to hang a small gift on the holiday tree:


Supplies and notes:
  • Cigar tin from my folks.  My dad smokes 'em, and my mom saves 'em for me.  I have a bunch-- if you want one, email me... I'll send it!
  • Strathmore watercolor paper inked with Black Soot through Tim's Doily stencil
  • Panel heat-set then glued to the top of the cigar tin with Mod Podge (my oldest jar) and left to dry with a large acrylic block atop.  Once dry, I sanded the edges with my Dremel.  Then I painted the lid's edges with Liquitex gesso in black.
  • Flowers made from Tim's shabby flowers Bigz die with Canson mix media paper.  
    • I used the two smallest flowers on the die and sprayed them with water then formed each flower loosely on the end of a paintbrush.  
    • When dry, I glued a few together with hot glue; I used hot glue instead of a water-based glue because I knew I would need to wet them a lot when I colored them.
    • I sprayed the dry flowers with a new-made mixture of Alazarin Crimson Color Burst and Heirloom Gold Perfect Pearls
    • The center was made by added Liquitex gel with glass beads (total stash item-- I hardly use this awesome stuff...) and then I added Martha Stewart Gold Liquid Gilding to the center and some edges
  • The greenery is my fave yarn; I knotted it in bunched and tucked it among the flowers.  
  • The sentiment stamp is old... the copyright information on the stamp says STM 2007... I don't know who that is... but I inked it with Ranger Archival in Jet Black
That's it!  Hope you choose to join us for the the challenge at Shopping Our Stash.  

Sunday, October 22, 2017

Yikes!

Fun in the shack this afternoon:


Look at that bat ribbon!

These are the stitchy stamps

Supplies and notes:

  • Library card base with corners snipped to make the tag shape
  • "Yikes" stamped with Tim's Xmas Alpha in Distress Embossing Ink and old dirty clear embossing powder by Custer's Last Stamp..
  • Tag first underwent wrinkle-free distress with Crushed Olive DI 3x
  • Tag then went through three rounds of wrinkle-free distress using Wilted Violet and Black Soot DOx
  • Black Soot DI inked through one of his MM dies made into a stencil
  • Stitches are by the great Andrea O-P/Snapping Monsters... go check out her Etsy store, she has made four stamp sets (right?) but only two are in stock.  I feel lucky 'cuz I have three.  Anyway, I inked the stitches with Ranger Archival in Jet Black.
  • Ribbon from a Making Memories Halloween collection and stash
  • Brads from a Making Memories Halloween collection
  • Snippet from an old state textbook reader adhered with Distress Collage Medium in Vintage
I'll share this with the following few challenges:

Friday, October 20, 2017

Witch Pins Tin

Another tin!


Supplies and notes:
  • Aluminum tin from the Asian food store
  • Witch Pin ephemera from Tim's pack from last year; trimmed and coated with Distress Collage Medium in Crazing the scribbled with Black Soot Distress Crayon
  • Pumpkin from the little shop at a pumpkin patch-- they are little seed pods of some sort, but they couldn't look more like little pumpkins, and they couldn't be better for crafting as they are sturdy yet lightweight.  I also used them on THIS project.
  • Pins from my stash.  I added some Viva Paper Pearls in Cream to the ends.
  • Distress Glitter in Black Soot added to edge of tin with Glossy Accents (...which also stuck to some of the crazing medium... I'm just too impatient...)
  • True Hemp metallic hemp 
  • Viva Paper Pearls in Cream also used to accent the cardinal directions of the tin with Pebeo Relief Liner in Lead to dot these stripes
I'll share this at the following places:

Thursday, October 19, 2017

A positivity journal

Happy to have made something that I can share with The Mini Album Maker's Challenge!  Not shabby for a quick throw-together...


(The back)


(This is the tag I started with)

(Scored leaves)

Fig. A: Created signatures

Fig. B

Fig. C

Fig. D

Fig. E
Fig.F

Supplies and notes:
Cover:
  • Large Ranger tag inked with Broken China DOx
  • Tag coated in places with Teresa Collins modeling paste through Tim's Cubes stencil
  • Various Lindy's Stamp Gang Magicals added, including Cotton Candy and Frolic in the Forest Green
  • Distress Paint in Spiced Marmalade and Chipped Sapphire added
  • Tag folded in such a way as to accommodate a couple signatures
  • Tim's wildflowers cut from library cards added using Distress Collage Medium in Matte
  • Tim's metallic Quotations stickers added to the cover and spine
  • Interior of cover fortified using 7 Gypsies masking tape, which is very similar to some true book-binding tape
  • Vintage yellow seam binding from my stash
Interior/signatures:
  • Signatures made in a very simple way: Canson mix media paper cut and laid in sets of three then sewn down the middle with the ol' sewing machine (Fig. A).  I made just two signatures, and in hindsight, this could have accommodated one or two more...
  • Signatures both glued to seam binding, at either side(Fig.'s B, C, D), then a bead of glue was added in between them and pinched together to further fortify the spine(Fig. E)
  • A strip of the seam binding was then added to the inside of the cover's spine and the textblock was added to the interior (Fig. F).
  • Tim's metallic Quotations stickers added to each page
I'll share this with the gals at The Mini Album Makers Challenge for October's challenge.

Jack

This was a fun project... spooky, right?

OOOoooHhhhh... spooky old-fashioned boy with a jack-o-lantern mask in a graveyard on Halloween? Yes.  Say yes.  It's spooky as hell...

I call him Jack:


The bat is showing up brightly in some of these pix, but in real life he is much more subdued and leathery.


This image shows the fine gold line on the outside of the box.

How great are these pumpkins?


Supplies and notes:
  • Box made by tracing Tim's Arch die onto heavy packing kraft, then adding a flange to make it dimensional.  After that I coated it with Teresa Collins modeling past roughly and painted it with black Liquitex gesso.  
  • Cheesecloth sprayed with Tattered Angels and some custom Perfect Pearls spray... though you can't see it now... it got covered up.
  • That black "thing" in the background is a piece of floral lace trim.
  • Tombstone is from Tim's ephemera pack-- it was actually a label and I typed on it then coated it with Distress Collage Medium in Crazing, and then rubbed some Black Soot Distress Crayon into the cracks.
  • The pumpkins are from a local pumpkin patch's gift shop-- they are truly little seed pods of some sort and are excellent to craft with because they are lightweight yet sturdy.  I stacked them using hot glue.
  • The boy is one of Tim's paper dolls from the standard collection. (I didn't get the Halloween pack... so bummed... but I got the xmas pack, so if anyone has Halloween and wants to trade a few dolls across the holidays, I'd be glad to!)
  • The jack-o-lantern that the boy is wearing is from Tim's ephemera pack from last year's Halloween collection, and the 31 tag is from the same set.  I coated the tag with Distress College Medium in Crazing and accented it with Black Soot DI at the edges and Prima Memory Hardware Artisan Powder on the front.
  • The bat at the top is a diecut that came in a goodie bag from The Funkie Junkie last Halloween.  I coated it with Distress Collage Medium in Crazing and added more Prima Memory Hardware Artisan Powder.

Tuesday, October 17, 2017

SOS: The walking dead...

Use a zombie!

It's that time of year... the Shopping Our Stash team wants to see the walking dead-- ZOMBIES-- on your creations!

Here's my tag:


Supplies and notes:
  • Strathmore watercolor paper coated with Teresa Collins modeling paste through a Tim Holtz stencil and sprayed with Dylusions sprays as a background... made months ago...
  • I sanded down the card with my Dremel... FUN.
  • Tree stamp by (uh-oh-- gotta look later...) and star stamp cut from a larger star stamp from Dylusions
  • Various Stickles used (colors I have hardly ever used-- purple, yellow...) and black Viva Paper Pearls
  • The wood zombie was from JoAnns this year, right as they were putting Halloween stuff out.  I bought a bunch of Halloween wood-cuts and have only used this one... so yeah for me using part of a stash that will likely live for a while... Anyway, I painted the zombie with Distress Paints
  • The sentiment was written with a Micron pen on a scrap of cheap watercolor paper that was just on my desk
  • Black pom-pom trim from my stash
  • Colorful yarn from Andrea Ockey-Parr... thanks!
10/21/17: Oh my heck... I meant to add to the Sisterhood of Snarky Stampers and just noticed as I was cruising the Saturday challenges that I DIDN'T!  So HERE!!!!