Tuesday, February 28, 2017

SOS: Spring color palette

Join me for another challenge at Shopping Our Stash... a challenge where we encourage you to use the supplies in your stash that maybe need a little love...

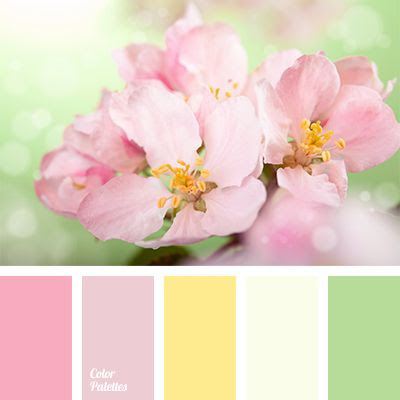
This week, we are doing something we don't do often: issuing a color challenge based on an image:


Here is my card:
Ugh... this image is so washed out!  I'm sorry!  The colors were truly much more bold IRL.  This winter is killin' me, with regards to photography!

Supplies:
  • Strathmore watercolor paper 
  • Faber-Castell Pitt pens for lettering and doodled wreath... haven't been using them as much as the Microns I got for xmas, so this was a choice in using my stash!
  • Spectrum Noir grey (IG4) used for shadows
  • Everything was "watercolored" using Loew Cornell brushes and the following DIs selected to match the given palette: Scattered Straw, Shabby Shutters, Spun Sugar, and Victorian Velvet.
  • I rounded the corners because of a boo-boo... 
  • Liquid Pearls added for a touch of dimension
Join me!  Got stash?  Link up at Shopping Our Stash, and for mo' better inspiration, go visit my DT homegirls, plus Ina!  

Friday, February 24, 2017

Tytonidae Tote *UPDATED*

How about this for transportin':

Tytonidae is the family name of barn owls.  Sounds cool, huh.

I bought tote bags to decorate. I want to test the washability of different mediums on different fabrics.
Supplies and notes:
  • Heavy canvas tote base
  • Distress crayons
  • Martha Stewart fabric medium, mixed approximately 1:1... maybe slightly more water... combined in a cup and painted over the drawn design
This is currently drying.  The Martha Stewart bottle says to let the design dry for 24 hours, then heat set... after that I will wash it. Fun, fun.

I'll share this as my second for the Simon Says Monday Transport It challenge, and my second for Make My Monday for birds.

UPDATE ON THE WASHING: The week was so hectic with MIL health issues that I never even went back to the craft shack for days... so this sat for about a week, and then I turned it inside-out and heat-set it for 30' in the dryer, then washed it in cool water and dried it normally.  There was some smudging and transferring of the crayon, but I feel like I knew that would happen.  Next time, I will focus more on painting the crayon with the fabric medium, really blending.  The thing is: that will take away some of that rough look that the crayon on canvas gives.  I'll keep you posted of any future experiments!

Colorful Kiwi

I think this is my first time playing with the folks at Country View Challenges!  I came across this challenge while checking my feed last week, and I saw Pear Shaped Crafting's post, and was so inspired by the time limit that I made a mental note to participate!

This project will go to a new co-worker who is originally from New Zealand.   I hope she likes it.

This is it:
First ten minutes...

After twenty mintues...

Thirty minute project!

Supplies:
  • Base is an old library catalog card lightly coated with Liquitex gesso and dried.
  • Teresa Collins modeling paste through a Heidi Swapp stencil then dried
  • LuminArte/Angelwings watercolors (from Autumn-- thanks!) used on the background 
  • Distress Spray in Tarnished Brass splattered across the background 
  • Kiwi cut from a Flonz discount card and adhered with Distress Collage Medium in matte
  • Pom-pom yarn from Tuesday Morning added to edges with Glossy Accents 
  • Glittery Thickers added for NZ
  • Flowers all from my stash adhered with Glossy Accents 
  • I rubbed some parts with some the turquoise DecoArt Metallic Lustre 
That's it!

Along with Country View Challenge for a less-than-thirty-minute challenge, I will also share this at the current Make My Monday where they are encouraging bird creations... you know, I need no encouragement here.  Birds are my primary inspiration.

Thursday, February 23, 2017

Middle-aged...

Is this saying perfect or what?

I saw the saying on Pinterest.  I definitely feel middle-aged... my daughter is on SnapChat and my MIL has a Life Alert.  I have Pinterest!  Thank you, Pinterest.

This panel was made the same day I made THIS and THIS
... with Color Bursts and a Heidi Swapp stencil.

I'd like to share this at the current Simon Says Stamp on Wednesday, which is an Anything Goes challenge.


Tuesday, February 21, 2017

Welcome Baby Girl

The wife of a wonderful district employee is having their first daughter in March.  I made this card for my site to give.  For those of you saying, "It doesn't look like a new baby card...," this couple is definitely NOT into pink!:
Pardon the image-- had terrible lighting... tired of winter!  Boo!


This shot shows the excellent luck with pooling of Glimmer Mist I had...


Supplies and notes:

  • Main DP panel and flowers were cut from Marion Smith DP, smooshed in some Tattered Angels Glimmer Mist and Spun Sugar DI
  • I stamped a watery Black Soot doily (by Tim Holtz for StampAnon) where I wanted to pile the focal pieces
  • Background mat is from one of my fave BG collections: Little Black Dress
  • Sentiment banner written and drawn on a library catalog card with Faber Castell Pitt pens and Micron pens, then inked with Spun Sugar and Tea Dye DIs
  • True Hemp metallic hemp "nest" in the background.  I'll have to contact Autumn and find out how the heck she does this-- what happens behind the scenes is nuts.  (I have some washi connecting the nest and two Recollections tint brads are holding the nest to the Marion Smith panel!  
  • The stamen peeking out of the top are from Wilton, inked with Mushroom Adirocndack alcohol ink
  • ...and pretty much everything has a bit of Frayed Burlap on it!
I didn't take a picture, but I added a watery doily inside the card as well.

I will share this for the current Simon Says Stamp on Wednesday challenge: Fantastic Florals.

I will also share this at the current Cupcake Inspirations challenge:
I didn't necessarily use a chalkboard technique, but one can easily see the connection between
this cupcake and my card!  In fact, wouldn't these make cute baby shower cupcakes?!

SOS: Mardi Gras!!!

I welcome you to join me for another week at Shopping Our Stash, the craft challenge where we revel in using items that we already have on hand!

This week, we are encouraging you to  create something (a card, tag, sign... anything, really) inspired by Mardi Gras!  Think revelry, drinking, partying, eating, bright colors... Celebrating Fat Tuesday, chere!

I straight up went into Mardi Gras mode, New Orleans style:


Supplies:
  • Started with a 7 Gypsies tag base-- trying to use these up. 
  • Used a Sizzix EF that has peacocks on it... very pretty, but I seldom use it. 
  • I sprayed the background with Dylusions in Cut Grass then wiped the relief with DecoArt Metallic Lustre in Gold Rush 
  • Made a boo-boo by trying to use a Pebeo Relief Liner for a sentiment... ended up coating much of the base with Distress Crackle Paint in Black Soot  (which is almost out.  I had to water it down!)
  • Then I sprayed with Lindy's Stamp Gang in Ethereal Emerald (I never use this because I think it has walnut strain in it, and my daughter has a severe tree nut allergy... I know: she's but going to ingest it... but I'm a total freak about her allergy.  Bodies are so weird, and her reactions are getting worse...)
  • After that, I sprayed the top half of the tag with Elmer's spray adhesive and added some awesome Stampendous glitter that's been in my stash for years. 
  • The mask was cut from scrap papers and outlined with Stickles in Black Diamond 
  • The feathers came from Pia... love them!  I colored one with Colorbursts prior to this project-- it was my inspiration for this tag!
  • The seam binding at top was pre-dyed and sent with a Halloween shipment from The Funkie Junkie Boutique
  • Sequin trim from my stash... relatively new.
  • Had to add beads!  Dyed some Darice pearls with Purple Twilight Adirondack alcohol ink, and as I laid them down to loosen the seam binding in order you add the beads, I decided I liked the "tossed" look... so I added a few dots of Glossy Accents and set a jar on top of it to dry as it lay!
Happy Fat Tuesday... what's for dinner???

...and when you're in your food-coma, grab a cocktail and get crafting in the spirit of Mardi Gras! Have some fun, huh?   For more inspiration, go see what my fellow revelers have fried up for you this week at Shopping Our Stash!

Monday, February 20, 2017

Retro Rubber by Mini-Me

My daughter did this for the current Retro Rubber:

Supplies:
  • Adirondack alcohol ink 
  • Sharpie markers for the sentiment
  • No-name snowflake colored with Marvy markers... the stamp is old, old old... easily 15 years...
I wish you could see the colors in real life.   She picks the best combinations!


Brown-baggin' it

The current challenge at Simon Says Stamp on Monday is "Transport it"...

I am always struck with awe and admiration at Andrea's DT creations... she always thinks outside of the box and I just bow down.  This week was no different, and when I saw her file folders, I was like, "She's done it again!  That intelligent..." I went on with my life for the past 24 hours, not thinking of SS Monday, and accepting the possibility that I just may not get to play with them this week when I had an unexpected "Aha!" moment: lunch bags!


Some of my faves...

More faves...


The butterfly is a Heidi Swapp mask, sprayed then monoprinted

This is a stencil I made, sprayed, then monoprinted

I was just burning up panels here...

I made some lunch bags a few weeks ago with Shakespeare on them (ironically, made Andrea a flour-sack towel during that same time period with The Bard on it...) and my kids were like, "Sure... I'll take that to school."  I offered to make some cool ones... and forgot. (I have a terrible memory. ) ...until my "Aha" moment.

Supplies:
  • My fave results were from using my overspray sheets, torn, sprayed with Elmer's spray adhesive, and affixed.
  • Some bags benefited from generous amounts of Dylusions sprays 
  • I used some panels I had laying around, also, and wrote on them with brush Sharpies
That's it! 🙄 Hope my kids have fun with these!

Sunday, February 19, 2017

More birds on library cards...

These are two small cards with panels made by monoprinting from a stencil used for THIS card.  I'm really impressed with the clean and un-muddied results:


Supplies:
  • Heidi Swapp stencil monoprints with excess Color Burst pigment
  • Library card bases mounted on to some scrap DP 
  • The crane was cut from a Sibley day-planner and the hawk was cut from a small basic guide from the 1970s.
I'd like to share this at the current TGIF Challenge:


...and again at Simon Says Stamp on Monday for Your Favorite Tool: scissors!

Red-shouldered Hawk

This is the most common roadside hawk in the Pacific Northwest:


Supplies:
  • Color Bursts through a Heidi Swapp stencil on Strathmore watercolor paper.  I added a few water droplets of my own with a waterbrush and LOVE this background... made it my phone's screensaver after a year of poppies! (I added a shot of this below... feel free to grab it!)
  • Black paper mat by Colorbok
  • The hawk is from an old children's guide
Oops... there's an edge on here... 
I will share this at the current Simon Says Stamp on Monday... Your Fave Tool: Well, I really don't use fancy tools.  I made a list because I was really wondering, "What's my favorite tool?"  My list included a heat tool, scissors, Crop-o-dial (seldom use, but it's so valueable when needed), Cuttlebug (from Autumn), paper cutter, paintbrushes, stapler, typewriter, ruler.  I ended up thinking about what I use most and what I could not craft without: scissors.  I read earlier in the week that Marzena said the same thing.  Now, don't compare my cutting to hers!

I'd like to also share this with the current TGIF Challenge

Saturday, February 18, 2017

HLS February CAS... blue

Made this really fast... planned to make a sympathy card, but then this happened!  Can you say SQUIRREL???


Supplies:
  • Taylored Expressions stamps (grown-up Grumplings). The elephant was colored with Spectrum Noir markers.  I'm not a colorer... don't zoom too much... and pardon the photography... it's been a snowy winter...
  • Ranger Archival in Jet Black 
  • The sky was watercolored with Chipped Sapphire and Stormy Sky DIs.
That's all she wrote...

I'll share this at HLS's February CAS:

I'll also share at Addicted to Stamps and More:


Wednesday, February 15, 2017

Goldfinch Love

Here's a spread from my small Dylusions journal:


Supplies and notes:
  • Dylusions sprays 
  • Martha Stewart stencil (compass star)
  • Sharpie brush pen
  • Bubble wrap with Distress Paint
  • Quotes from an old reader
  • Jane Davenport's washi tape
  • Library card art created over time... previously stamped with an Inspired By Stamping goldfinch in Dina Wakley's mixed-media palette, some extra inkiness from another project, and it looks like Tim's doily stencil...  The card was affixed by spraying the reverse with Elmer's spray adhesive and then using Dina Wakley's mixed media tape-- pleasantly sheer and subtle 
  • Dina Wakley's heart stamp (also a piece from the past) colored with Colorbursts.  Popped up on dimensional tape. 
  • The fire of the now-sacred heart was made from a scrap of an over-watered Colorburst panel.
  • Almost forgot: there's some Tim Ledger Script on here, too.
I'll share this at the following challenges:


Congrats! A non-traditional baby card

Here's a more untraditional baby card, but if you knew the family, you'd know I hit the nail on the head:


And just for fun, here's the envelope:


I used a deer-die from my friend Pia (takk!), Crushed Olive and Chipped Sapphire Distress Inks, a Heidi Swapp stencil, Faber-Castell Pitt pens, a Tombow marker, and some scrap paper.

Confession: I truly made this in November and the pictures just surfaced. But I like it to much to not share...

Tuesday, February 14, 2017

SOS: Romance minus the hearts

Happy Valentine's Day!

This week, us girls at SOS are encouraging you to make a romantical card with no hearts!

Here's a tag for my sweetie:


Supplies:

  • 7 Gypsies tag inked with DIs and edged with a good ol' Sharpie
  • Scrap of double-embossed paper I made a month or two ago... it just lived on my desktop for a while...
  • Tim Holtz StampAnon Day of the Dead wedding couple inked with Ranger Archival in Jet Black and smooshed in DIs
  • The cute couple has some various Stickles accents as well as the oldest product on this project: some ancient Red Tinsel Stamp'n Stuff, applied with a Zig Emboss Writer. 
  • Ric rac... also been a staple in my craft-hoard forever
  • I typed the quote over a year ago.  For this project, I dipped the edges into the smooshing DIs
  • BTW, lots of black Ranger foam tape for the dimension... I've had this stuff for almost two years... just need to use it!
Yay!  Feel the love!  Enjoy the inspiration over at Shopping Our Stash this week... the team always impresses me, but it's another crafty-mind-blowing week!

I am also going to add this to the current Creative With Stamps challenge with my friend Monika... I meant to originally, but (nervous laughter) pretty much forgot to even finish my post!  I'm losing my memory!!!