Wednesday, December 21, 2016

Freshly Made Sketches!

Long time, no play with FMS!


Here's the Freshly Made Sketches graphic:


Supplies and notes:

  • I made the colorful panel last week with Color Bursts through Tim's Honeycomb stencil... this is actually the second panel I made like this because my teen took the first one.  I can't say no if my kids want something I make!
  • The yellow panel is from my scrap bin, and I just want to say that I cut it "accidentally" at 5", which prompted me to rethink the orientation of my card!  
  • I typed the quote and adhered it...
DONE!  Likey?

STAMPlorations December...

... theme and sketch...


Here is the actual sketch and graphic from STAMPlorations:


Supplies and notes:

  • The flowers (by STAMPlorations) stamped in Ranger Archival on an old dictionary page then Colorbursted
  • Fussy cut the flowers and pasted them onto black scrap paper with matte Mod Podge, then pasted over them to seal them
  • When dry, I ripped the paper and pasted it onto the card
  • "Thinking of you" written with Faber-Castell Pitts
When I made this, I had just finished my hand-deliver holiday cards... I needed non-xmas!  Is that bad?  Don't worry... I still have the holiday spirit.  I just need to drink some eggnog to recharge it!


Tuesday, December 20, 2016

SOS: Celebrating Winter

We are quickly chugging through the holiday season, but in the northern hemisphere we will technically be welcoming winter this week!

At Shopping Our Stash, we are coincidentally asking you to share a project that is inspired by winter, but not the holidays!  Think you can do it?  Of course you can!  Snow, snowflakes, cold weather, winter activities, winter foods and beverages...

Here are my wintry tags:


Supplies and notes:
  • The base library tags were Color-Bursted last week through Tim's plaid mini stencil
  • The focal image on each has been in my stash for almost a year... they were a clearance purchase after last winter from Cost Plus World Market.  I like how they are somewhat sheer-- you can see the plaid through them in bright light.
  • I typed the sentiments on an old catalog card and dipped them into my neglected Distress Paints... I feel like I haven't used these in a while.  "Bon hiver" means "good winter" in French.  Have you ever heard of the musician-turned-band Bon Iver?  They got their name from "bon hiver..." Look them up.  I'm fond of the first album, and once you read how and it came to be, you will be intrigued.
  • The yarn came from a booth at the quilt show back in August
See you ovet at Shopping Our Stash for some wintery inspiration!

Sunday, December 18, 2016

JUGS Color Challenge!

I haven't played with JUGs in about a month... here I am!


Here is the challenge (which I love):

Supplies:
  • I had the navy scraps out from the Zombie Santa of yesterday, still next to my paper-cutter
  • The "Happy Holidays" panel was in a stack of holiday word diecuts, cut but unclaimed.
  • I dug in my scrap bin for a piece of orchid cardstock, but I saw the glittery sheet and thought, "YESSSS..."
That's about it!  Pretty darned easy, and I really like the hip look.  Plus, very flat-- easy mailer.


Shabby vintage tree

Hello!  Yes, it's me... I know you can't tell with the shabby tree, especially after the Zombie Santa post of yesterday!  Enjoy yourself as you experience my softer side :)...


Supplies and notes:

  • The base of this tree is the cone from an old spool of yarn, probably about 8" tall.  First, I roughly painted it with white Liquitex gesso, then rubbed some Prima powder in Ivory on it.  Then I painted some conifer branches using Frosty Forest Green Lindy's Stamp Gang Magicals (New!  These are my latest supply!).  After that dried, I rubbed it all with DecoArt Metallic Lustre in Gold Rush... I love using that stuff.  I always end up singing, "Goldfinger... he's the man... the man with the Midas touchhhhh...."
  • Next, I added stuff from my latest Funkie Junkie Boutique purchase bonus bag... it included flat-sided pearls, singing cherubs, shabby seam binding dipped in gold (Tarnished Brass Distress Spray, Linda?), and some wings cut from crinoline.  I glued the pearls all over with Glossy Accents.  I cut the cherubs out and edged them with Brushed Corduroy DI and then added Crackle Accents.  The wings were glued to the tree and rubbed with more DecoArt Metallic Lustre.  I finally added the cherub panel.  
  • The cherubs were lonely, so I placed them among some white roses, initially sprayed with gold Perfect Pearls, but I need a new bottle... it was just sputtering... so I rubbed them with more DecoArt Metallic Lustre.  I placed them on top of some Wilton glittery stamen.
  • The ribbon from Funkie Junkie was wrapped around the tree.
  • All kinds of spare Mini Seasonal Greens (cut from Metallic Kraft-Core and old sheet music) was added, along with a little "dusting" of Aleene's snow
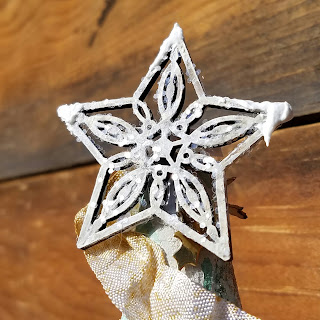
  • The star at the top is a Recollections wood cut, coated with white Liquitex gesso and sprinkled with Martha's unmatchable glitter.
  • There are also some Crate Paper wood veneer birds, coated with Glossy Accents and covered with Distress Glitter in Antique Linen
I started this project on Friday afternoon, and was done with it Saturday... that's pretty good turn-around for me these days!  And I haven't done much shabby work lately-- it was fun to use a different part of my craft-brain!


I plan to share this at the following challenges:

CASology: Bow

Thought I'd do a little CAS warm-up today, based on the current challenge at CASology:


Supplies:
  • Small kraft card stamped with a generic bow stamp inked in Ranger Archival in Jet Black 
  • "Thanks" written with a Zig Emboss Writer and embossed with Ranger EP in Princess Gold
Ta-da!

Here's the CASology graphic:

Saturday, December 17, 2016

XXX Bad Santa XXX

This was fun to make...


I had waited to buy this stamp set for a while, thinking that the people I know who would appreciate this are few.  But... I finally pulled the trigger.  It needed to happen.  I have always personally appreciated things that exist at the fringes... Zombie Santa is one of those things.  My cousin will love this.

Supplies:
  • Brett Weldele Zombie Santa stamps inked with Ranger Archival in Jet Black
  • Zombie Santa watercolored using Distress Inks
  • I made a mask of Zombie Santa and used a Brett Weldele stencil and Ken Oliver Color Burst for the cool background.
  • The navy background is a piece of scrap paper
  • I popped the sentiment up on dimensional adhesive
I'll share this at the following challenges:
Thanks for stopping by... I know this is a little macabre, but I hope you enjoy it!

Merry, Merry, Merry

Good day!


Supplies and notes:
  • This panel originated a few months ago, but I only just pulled it out with fresh "holiday eyes"... haha!  I'm ready now!
  • Strathmore watercolor paper stamped with an old pine bough stamp in Jet Black Archival 
  • The stamped area was smooshed in some Aged Mahogany and Pine Needles DIs
  • Sentiment written with a Faber-Castell Pitt Brush pen
  • Edges of paper distressed with a Making Memories distresser (my favorite distresser... I did not like the Tonic distresser and got rid of it, which is something I seldom do with craft supplies)
  • After the edges were distressed I rubbed them with DecoArt Metallic Lustre in Gold Rush 
  • Stampendous Aged Gold frantage EP added
I'll share this at the following challenges:

Hip holidays

This totally reminds me of my friend Brooke.  I think I'll give it to her to give someone.

Darn lighting this afternoon...

Supplies:
  • DCWV polka-dotted paper from the watercolor stack
  • Gold paper in the background is Core'dinations collab. with Tim Holtz-- it's the metallic kraft-core... love it!
  • Sentiment was cut with Tim's Holiday Words dies
  • Studs are by Recollections 

I'd like to share this at the following challenges:

Holiday Thanks

I love the custodians at my school.  I appreciate the work they do for me and everyone else at our site.  Actually, I substituted for one of them this fall because there are no custodian sub.'s in our area and one hadn't taken a week off in 36 years-- it proved to be hard work!  (... and I didn't even have to do all of the stuff they normally do... I just had to vacuum classrooms and empty classroom trashes after school!)

Anyway, I love those guys.  I buy them a bag of coffee every year for Christmas, and these are the tags I taped to them (using 7 Gypsies red msking tape, not shown... but looks perfect for a couple men):


Supplies:
  • The library card bases were painted with "Thanks" a few months ago when I was practicing my true brush lettering for a project at Tag, You're It
  • For the seasonal touches, I used Lindy's Stamp Gang Magicals mixed with some water on my mat and painted some conifer branches and berries, and I also added some splatter.  (I used an old, tore-up brush, and it yielded excellent results with it's misshapen bristles and gunk!  Looking forward to playing with my messed-up brushes [thanks, kids] in the future!)
I plan to share the "Thanks" tags at the following challenges:


Tuesday, December 13, 2016

SOS: Tag, you're it!

We are in the thick of the holiday season, and this week at Shopping Our Stash, we are encouraging you to make some tags with the craft items you have hoarded lovingly saved.

My tags are for the fancy beers my husband gives his coworkers every Christmas:

The metallic Dstress Stain was actually very effective in making these festive.

The beer is called "Reason for the Season" and it has trees on the label... sorry I didn't get a picture of it.

Supplies and notes:
  • 7 Gypsies tags bought last summer when I forgot library cards on a trip out of town
  • Red and green twine from the dollar store last winter
  • Vintage Photo and Tarnished Brass Distress Stains... probably a couple years old each.  I inked them onto the craft mat then added water and smooshed.  (I wanted to do a starry-snowy sky with Chipped Sapphire and Brushed Pewter, but the hubs wrinkled his nose like that would be too froo-froo... he wanted the aged look.  Fine.  For the record, he also wanted basic hemp twine, but I over-rode that and added the festive red and green.  Ha.)
  • The trees were cut using a brand new die out of Crate Paper from years ago, adhered to the tags with Mod Podge my sis bought me for Christmas last year.  Oh, I also edged the trees with Frayed Burlap DI just for a bit of dimension.
  • The "Cheers" stamp is from a Target set from a few years ago inked with Vintage Photo from the Mixed Media palette.
I hope you join us... make some tags!  (If you want to see some truly pretty work, go check out my SOS sisters... they are the bomb!)