Supplies and notes:
- The base of this tree is the cone from an old spool of yarn, probably about 8" tall. First, I roughly painted it with white Liquitex gesso, then rubbed some Prima powder in Ivory on it. Then I painted some conifer branches using Frosty Forest Green Lindy's Stamp Gang Magicals (New! These are my latest supply!). After that dried, I rubbed it all with DecoArt Metallic Lustre in Gold Rush... I love using that stuff. I always end up singing, "Goldfinger... he's the man... the man with the Midas touchhhhh...."
- Next, I added stuff from my latest Funkie Junkie Boutique purchase bonus bag... it included flat-sided pearls, singing cherubs, shabby seam binding dipped in gold (Tarnished Brass Distress Spray, Linda?), and some wings cut from crinoline. I glued the pearls all over with Glossy Accents. I cut the cherubs out and edged them with Brushed Corduroy DI and then added Crackle Accents. The wings were glued to the tree and rubbed with more DecoArt Metallic Lustre. I finally added the cherub panel.
- The cherubs were lonely, so I placed them among some white roses, initially sprayed with gold Perfect Pearls, but I need a new bottle... it was just sputtering... so I rubbed them with more DecoArt Metallic Lustre. I placed them on top of some Wilton glittery stamen.
- The ribbon from Funkie Junkie was wrapped around the tree.
- All kinds of spare Mini Seasonal Greens (cut from Metallic Kraft-Core and old sheet music) was added, along with a little "dusting" of Aleene's snow
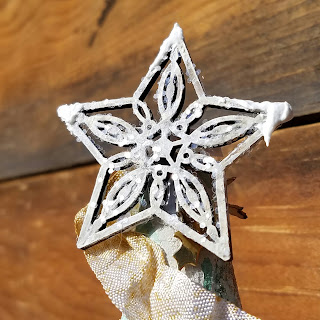
- The star at the top is a Recollections wood cut, coated with white Liquitex gesso and sprinkled with Martha's unmatchable glitter.
- There are also some Crate Paper wood veneer birds, coated with Glossy Accents and covered with Distress Glitter in Antique Linen
I started this project on Friday afternoon, and was done with it Saturday... that's pretty good turn-around for me these days! And I haven't done much shabby work lately-- it was fun to use a different part of my craft-brain!
I plan to share this at the following challenges:


This is so so cool! What fun that the bonus bag was such an inspiration to you and led to this amazing creation! Love it! Christmas hugs, Autumn
ReplyDeleteso lovely - such a great Christmas decoration - thanks for joining us at the HLS Mixed Media Challenge
ReplyDeleteOh myyyy
ReplyDeleteI never made similar like this Mimi
stunningggg
woowww so many element
and I guess it need more than one hour to finished??
Great project Mimi
do you send this or use at your home
lovely made my friend
beautiful - thanks for joining us at Happy Little Stampers
ReplyDeleteBarb Housner (DT)
I like your soft-side other part of your brain creation very much! Hope you had a wonderful Christmas and I wish you the very best in 2017.
ReplyDeleteAw, this piece sure looks amazing! Noticed those fabric like angel wings, very pretty, great touch! Well done!
ReplyDeleteLove your shabby side, Mimi and how you've used your goodie bag goodies from Linda--mine are stashed for next Christmas!
ReplyDelete