Tuesday, March 28, 2017

SOS: Side-by-side

Greetings, paper crafter!  Another Tuesday is upon us, and this week at Shopping Our Stash, Chana is our host and she has brought forth the challenge of Side-by-side... make a step card!

I do love measuring, scoring, and building, though I seldom make step cards.

Here is my card:

Supplies:

  • The circle die is from Autumn, thanks!  I inked it with layers of DOx then stamped an old foam dinosaur stamp found at the elementary school in Distress Paint in Walnut Stain
  • The card base was sprayed withLindy's Stamp Gang spray in Ethereal Emerald 
  • The bones were cut from some Tim Holtz resist paper that was just sitting on my desk
  • The "Happy Birthday" portion was cut from prayer from my scrap bin using Tim's word dies
  • Those cool green adhesive tiles are years old... never been used!  I really like them... glad I got to use them after all this time!

I have to share that I actually made five step cards in preparation for the current challenge.  Meh.  Not in love with any... don't you hate that?  I had such high hopes...

This is the first card I did for this challenge:
It's cute, but not"me."  I wrote the sentiment in French and used pages from an old French dictionary.  The main stash item is that rose panel.  It's from a packet I purchased multiple years ago.

Well, show me how it's done!  My teammies are so inspiring... go check them out at Shopping Our Stash!

Wednesday, March 22, 2017

Talk about dying...

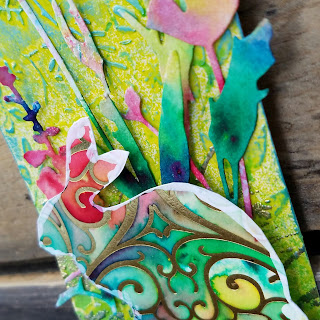
...as in egg dye... this is so colorful:


Supplies:

  • 7 Gypsies tag originally sprayed with Dylusions in Lemon Zest and Cut Grass, plus some spraying through a Moroccan Heidi Swapp stencil, but that pretty much got covered up by...
  • Prima flower stencil used with Ranger transparent texture paste, then rubbed with DecoArt Metallic Lustre in Brilliant Turquoise 
  • An old grassy stamp (Stamp A Mania) used at lower part of tag with two embossing powders: Stampendous green and Ranger Princess Gold.   The green was lost... I had much higher hopes...
  • The flowers are by Tim Holtz and new to my small die collection. These were cut from lightweight (read "cheap") watercolor paper and colored with Color Bursts. I LOVE the way they look!
  • The bunny was traced onto some pre-inked (with Color Bursts) Recollections resist paper from a Martha Stewart stencil.  I fussy-cut it then wiped some white Liquitex gesso around the edges to make it stand out more.  None of these shots show it, but the bunny has some bright gold flourishing.
  • Though you can't see it well, the awesome pom-yarn is very complementary and colorful... thanks, Andrea!  
I'd like to share this at the following challenges:

Tuesday, March 21, 2017

SOS: Forest Friends

This week at Shopping Our Stash, we are encouraging you, deer crafter, to create something including our forest friends.

I'm honored to be hosting a true friend's baby shower!

Here are the invitations:

Here are some images of the process:


Some turned out better than others...

You can see where I modified the block, and I tried to show this by blacking out the stars on the front.  I then took a trio of cut stars and glued them to a cork for a mini-stamp. 


Supplies:
  • Hand-carved deer stamp from pink Speedball rubber and Stampin Up! tools.  Stamp inked with Tim's Mixed Media palette in Vintage Photo and "kissed" onto an old wood-grain stamp by All Night Media
  • The stitched circle die is from Autumn at Sew Paper Paint; I wrote the greeting with a Micron pen... not sure which width this is-- I tried a few different weights, but liked these with the finer tip.
  • The stars are from a Dyan Reaveley Dylusions stamp that I love, but seldom use... until now!  I finally realized I needed to modify the stamp to work for me!  I cut some of the stars off to make the stars more free-form in shape, instead of the rectangular group that they were.  This was inked with Story Sky DI, tapped-off once then used twice in the process.
  • The pine sprays were hand-brushed with the Ranger waterbrush in Forest Moss DI.  I recently purchased two new waterbrushes, but they are still in their package.  I still wonder: why so expensive???
Thank you for joining us at Shopping Our Stash this week!  I am interested to see the stash items you find!  C'mon... I know you all have foxes and deer and bears... oh my!


Monday, March 20, 2017

Angular Thanks

This was easy, and I really like the layout from Try Stampin' On Tuesday:

Here's the sketch:

Supplies:

  • Tim's word dies cut from scrap Core'dinations black CS
  • Background made using Color Bursts through a Heidi Swapp stencil on Strathmore watercolor paper 
That's it!

I'd like to share this at TSOT, obviously, but also at AAA Cards for their current CAS game:


Wednesday, March 15, 2017

Epic

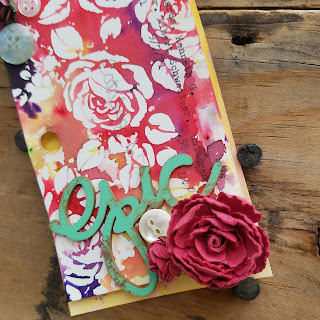
Love these colors:


Supplies:
  • Library card focal made with Fucshia, Chartreuse, and Lavender Color Bursts monoprinted from a new Tim Holtz stencil.  Card popped up with dimensional adhesive on the background tag.
  • Background tag is by Ranger, inked with Fossilized Amber DOx then some Wilted Violet DOx 
  • The wooden "epic" came in sea-green from Heidi Swapp, then I dabbed a bit of Walnut Stain Distress Paint to age it a little
  • The flowers are from my stash (though I believe they came from Hobby Lobby and The Funkie Junkie Boutique)
  • The buttons are all from my stash, mostly vintage besides the flower-shaped one
  • The seam binding is also vintage, dyed with a mixture of Lindy's Stamp Gang Magicals and Ken Oliver Color Bursts 
Gave this to a friend whose youngest daughter has faced medical issues since birth, yet this baby is absolutely blowing the minds of all... she is EPIC.

Tuesday, March 14, 2017

SOS: Get your GREEN on!

This week at Shopping Our Stash, we want you see some GREEN!  

This does not have to be a St. Patrick's Day card or project, but by all means, if you're  feeling the Irish spirit, go for it!

Here is my non-St.Patrick's Day card, though I do LOVE this holiday:


Supplies
  • The main panel is a piece of hoarded packing kraft from a textbook shipment.  It was coated roughly with Liquitex gesso and then inked wth a mix of Ken Oliver's Colorbursts and Lindy's Stamp Gang Magicals.  It lived on my desk until this challenge cane along.  
  • The coral garden was fussy-cut from a child's ocean guide from the early 1960s. 
  • I found the quote by Jules Verne and wrote it out with a Faber-Castell Pitt pen
  • The kraft background was decorated using an old Fiskars stamp set (used maybe twice in five years?), stamped and embossed with Lindy's Stamp Gang EP in Oakleaf Olive from the Industrial Chic collection.  
  • I also cut some seaweed/coral using Tim's Mini Holiday Greens and some decade-old K & Company paper
  • The main panel was popped up with dimensional tape
  • Liquitex glass bead gel was added in a few places for some tiny-bubble effect.  
  • Pebeo sand texture was added at the bottom of the panel... this is definitely a stash item-- don't use it often, but when I want it, there's no substitute!
Join us at Shopping Our Stash... feel the satisfaction of using the supplies you have and love but don't use often!  Or maybe items you bought and have not used yet!

And... Happy St. Patrick's Day!

Monday, March 13, 2017

Two STAMPlorations Birthday Cards

Really like both of these:


Supplies:
  • STAMPlorations flower 
  • Ranger Archival in Jet Black 
  • Strathmore watercolor paper 
  • Dylusions sprays in a palette, watercolored wth a Loew Cornell brush 
  • Sentiments written with a Sharpie and a Zig Emboss Writer + Recollections EP
  • The doily on the top card is from Wilton , sprayed with Dylusions
  • The stitched circle on the top card is from Autumn... thanks!  Such a practical die!  
I'll share these at the following challenges:

Color Throwdown

I haven't with Color Throwdown in about a month:

Pardon the early morning light... rrr...

Here is their color inspiration image:

Supplies:
  • Lindy's Stamp Gang Magicals on lightweight watercolor paper
  • Tim's word dies and wildflowers
  • DO on the flowers

Tuesday, March 7, 2017

SOS: Cracked up!

Here we are at the latest Shopping Our Stash challenge and we are encouraging you, dear crafter, to use crackle medium (or employ a faux-crackle technique).

This is my offering:


This is a ton for word-clippings from books...

Supplies and notes:
  • The tin was originally a Newman's mint tin-- definitely a stash item as I can't seem to throw them away!
  • The lid was coated with black Liquitex gesso 
  • The text and bird (both pre-cut stash items) were adhered with Ranger Collage Medium in Vintage
  • Ranger Crackle Accents  was used to coat the lid.   Though I'm totally happy with the results, the crackling was not as prominent on this piece, and I'm thinking this was the result of the temperature and humidity in the craft shack.  My generous layer of the Crackle Accents didn't help any-- if it were thinner, it would have crackled more.
  • I used Prima Artisan Powder in Vintage  Ivory over the cracks.   This is definitely a stash item: I bought it months ago, and though I try to use it often, I am never like, "Wow, such an amazing product..."  in fact, this is the best thing I've ever done wth it. 
I love crackle paste and have tried at least three kinds, so if you don't have any, I recommend the $4 purchase, or try a variety of faux-crackle techniques and share wth us at Shopping Our Stash

Sunday, March 5, 2017

Sweet 14

My biggest girl is about to turn 14.  She loves Hawaii:


Supplies and notes:
  • Library card colored with warm Color Bursts 
  • Palm tree stamp by Inspired By Stamping,inked in Ranger Archival in Jet black
  • Burlap panel from Autumn (thanks!)
  • The natural material at the bottom is from Maui: it's shedded piece from a tropical plant
  • "Smile" from the dollar bins at Michael's
I knew I wanted to use the palm tree library card, and I remembered that the current STAMPlorations sketch has a long panel in it, so I referred to it for my LO:
I didn't go with the spring theme...


Saturday, March 4, 2017

Untrustable sisters

This was one of those layouts that spanned over two months of tinkering:


Supplies and notes:

  • The book is the Childcraft art journal made in December 
  • This spread was coated with white Liquitex gesso back in December or January 
  • Distress Inks were applied directly and through home-made stencils, and ink was also removed through the same stencils using a baby wipe in January
  • The sisters were drawn with the tube of Dylusions spray bottles-- London Blue and After Midnight in February 
  • I was looking at this on Friday as I was trying to get some craft-therapy, and the Built To Spill song Untrustable/Untrustable 2 came on my Modest Mouse radio on Pandora, and I totally went with it-- grabbed a Faber-Castell Pitt and began writing.  Oh, I also added black toenail polish at this time!

For A-Joy

My niece's mom's birthday is coming up.   Her middle name is Joy, and so I had it stuck in my head to use this Christmas Tim Holtz die for her birthday card!

I think I need to bust out a few more cards with this concept-- I have tons of cool backgrounds lying around-- would be a great way to use them!  I just ordered another word die set like this but with more versatile occasion sentiments.  Yay. Plans for more crafting!


Supplies and notes:

  • Recollections watercolor resist stack panel colored with Color Bursts
  • Background paper from my stash
  • Tim Holtz Christmas words die

I plan to share this at the current JUGs challenge: